Mebane-Nuckolls House
A Coon Tale
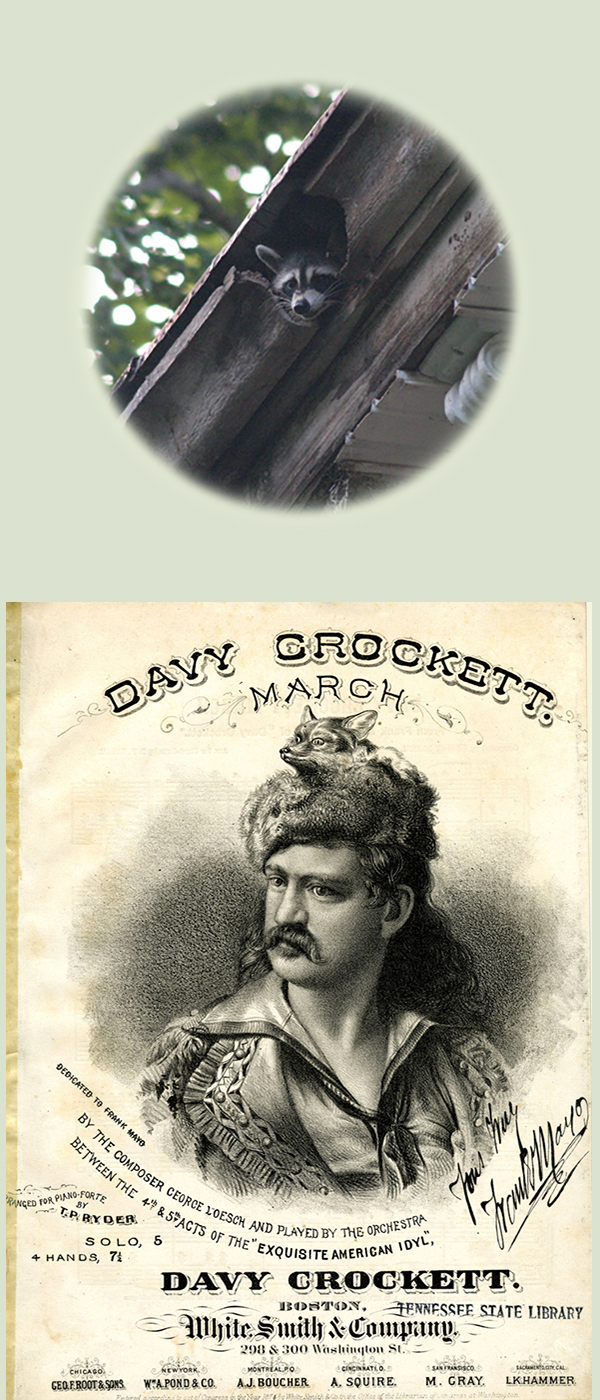
I now understand why Davy Crockett chose the coonskin cap. Tennessee is full of the critters. Despite being a roadkill mainstay, live ones are everywhere. There is no doubt that the post-apocalyptic world will be well-stocked with 'coons.
One day in July, I came in from work and spotted this one way up on the top of the house. It had set up housekeeping in the attic via a large hole that I suspect a squirrel had chewed out long ago.
Bonnie had been telling me that something was up there making noises. Now that we knew it wasn't Maggie's ghost, I needed to respond.
For several days, the old cat-and-mouse game played out. We would wait until it got over to a tree and try to shoo it away, but it always scurried back to the roof and down into the hole. Frustrated, I took my .22 rifle back behind the cookhouse and waited. And waited. The 'coon eventually came out. It was headed onto the roof, and I swear every bit of it except maybe one toenail was out of the hole.
A single shot did him in, later confirmed to be right between the eyes, perfectly timed as he glared back at me.
The animal began flopping and seizing, and clinging by that toenail. Amazingly, it somehow did a cartwheel and landed back in its hole!
"No problem," I said. "I'll go up in the attic and pull it out of there."
Now, it must be understood that some effort is required to reach the attic. But Joey and I got up there with flashlights and keen hunting instincts. In no time, we found the raccoon, dead as a hammer. But how do we get to him?
It was then that I discovered how the box cornice had been built, cantilevered out about 3 feet and supported by elaborate heavy timbers.
Joey crawled down in there between the joists and rafter extensions. I was much too fat at the time. With my holding Joey by the ankles, he was barely long enough to reach in there and grab the coon's tail. But it was stuck between a rafter and a joist.
"Pull," I said.
"I am pulling."
"Pull harder!"
He did. Joey's pretty strong. He yanked, and the coon's tail came with Joey. The rest of the animal was still down there, and we could see him but we could not grab him with anything.
Again, this was late July. The outside temperature was in triple digits. Our attic was like an oven. Let me tell you dead animals get really ripe in attics in the summer. This got worse over several days to the point where it was nauseating. And it lasted for about three weeks. I think the fly population in west Tennessee doubled. Bonnie and the kids reminded me more than once that I messed up badly.
Needless to say, I came away with two lessons from that folly. Never, ever do that again. And we had a cornice that needed fixin'.
Jim Nolan enters, and a huge project unfolds
We needed to find a new contractor. Bonnie and I were not going to be pushed too fast, and we needed better control over the money drain. We would not borrow even if it meant tools would have to be laid down in the middle of a project. Up to this point, almost every piece of wood came from a millworks. They were charging us to plane lumber down to true dimension, and we were paying for custom knives almost every time molding was laid down. I decided that we should be able to make many of our own moldings and start making true-dimension lumber out of rough. I bought a large, commercial grade planer and other equipment like a 24" bandsaw. We already owned a big Powermatic table saw, compound miter saw, drill press, and other necessary tools. It was time to go into production.
My biggest issue with the previous carpenters is they were set in their ways. I never could get them to use the miter saw, for example. They preferred to free hand with a skill saw, and were very good at it. But there is no way they ever cut a right angle or 45 with the precision of a miter saw. My problem with the general contractor was the 20% cut he was taking on all labor and materials. I wouldn't have minded it so much if he did something more than drive by once a week to make howdy rounds and pick a check up. Granted, he did call in orders for lumber and millwork. But there was no incentive to cut costs or hold down project creep since the more it cost the more he made. We couldn't afford to keep this up.
Chelius introduced us to Jim Nolan, and after a long meeting of the minds we took off into uncharted territory. On this first project, Jim was a crew of one. I did quite a bit of fabrication in the shop and hauled a lot of heavy lumber up to him, but it boggles my mind to think how much Jim accomplished over those six months.
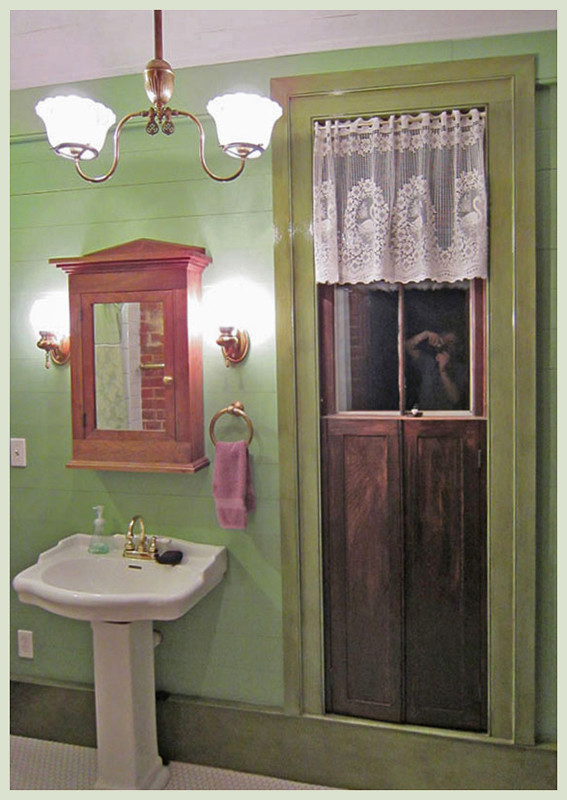
Our first project with Jim was a renovation of the master bathroom.
Jim and I completely rebuilt this room. The walls are matchboard as would be expected for this period. All of the moldings were built in my shop and are copies of originals in other parts of the house. I made the medicine cabinet out of walnut from trees we lost in the 2003 storm. I overhauled the window, installed new counterweights, and build the shutters and linen closet out of wood from the big pecan tree that we lost.
We found the paint colors, including the glaze, under a door knob rosette in the adjoining room.
The tub came out and a shower was built. We went with subway tiles in the shower and hex tiles on the floor for a 1920s look.
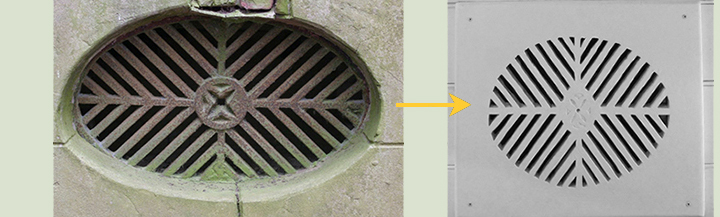
Every bathroom needs a ceiling fan vent, but the plastic cover did not go with the theme. I took a picture of one of the old cast iron vents around the base of our house, reproportioned it to a less elliptical shape in Photoshop, and printed off a template. Joey and I then made a vent cover out of a single large piece of pecan wood.
The beaded matchboard ceiling was also made in our shop.
We moved immediately into a long restoration of the entire cornice of the two-storey building and replaced the roof with its integral gutter. Finally, we restored the upper part of the west gallery (front porch) and built a ballustrade on top of it.
A scaffold went up all the way around the house and we surveyed the damage. That scaffold rental ended up costing over $6000, so before the next project I bought some. It has paid for itself many times over.
The cornice had an integral gutter which had rusted out, allowing water to come through and eventually cause extensive rot. The entire gutter would be replaced. Most of the soffit and much of the molding needed replacing.
The box cornice was cantilevered out and supported by heavy timbers. Many of these timbers were rotted out and would have to be replaced. I ended up making about 60 timbers with my tablesaw and bandsaw. There were various types, each 3" thick pecan wood ranging from 36-52" long. They were elaborately shaped to mate with each other and also with all of the moldings that would be nailed to them.
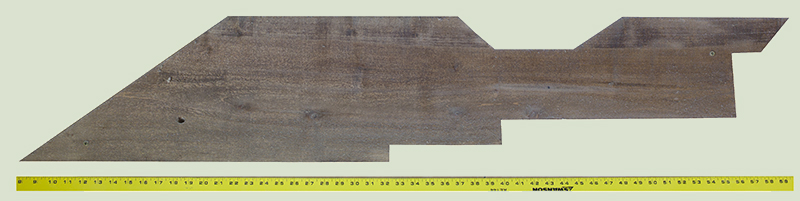 One of three templates I made to cut out the timbers. Each was different in size and complexity. The long angled cut on the left tied in to the timber frame of the roof. The large trough in the top supported the gutter, which was in turn framed with 1" thick boards ripped on the proper angles and nailed in place prior to setting the copper in. Additional cuts in these timbers provided surfaces to nail the soffit and various moldings on the outside.
The previous owner had encased the cornice in aluminum and vinyl siding. To accomplish this, he knocked off and threw away over 400 dentil moldings. Ghost impressions of the dentils are visible as unpainted rectangles in this photo. Without the blocks in place, they really did look like teeth.
An example of the effort they made to close everything up in vinyl and aluminum siding can be seen in the above raccoon picture. Encasing in siding allowed them to avoid painting, but it kept water in and accelerated the rot.
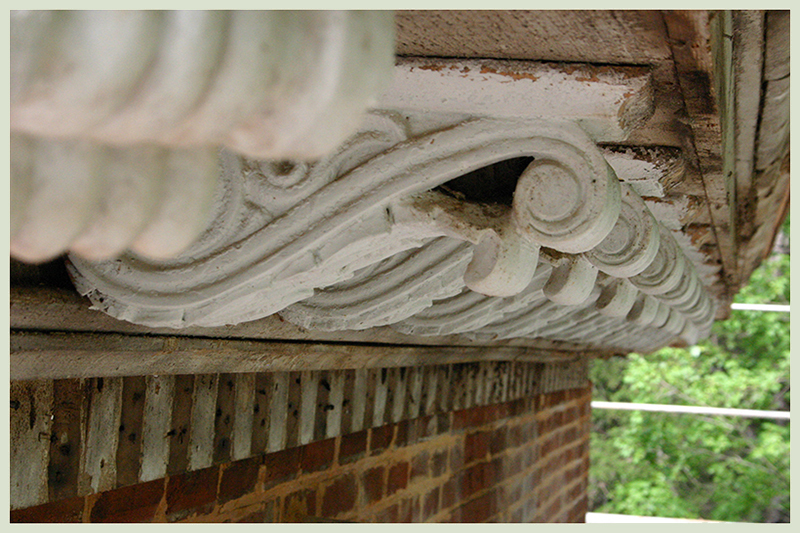
Quite a few of the large terra cotta brackets were broken or missing.
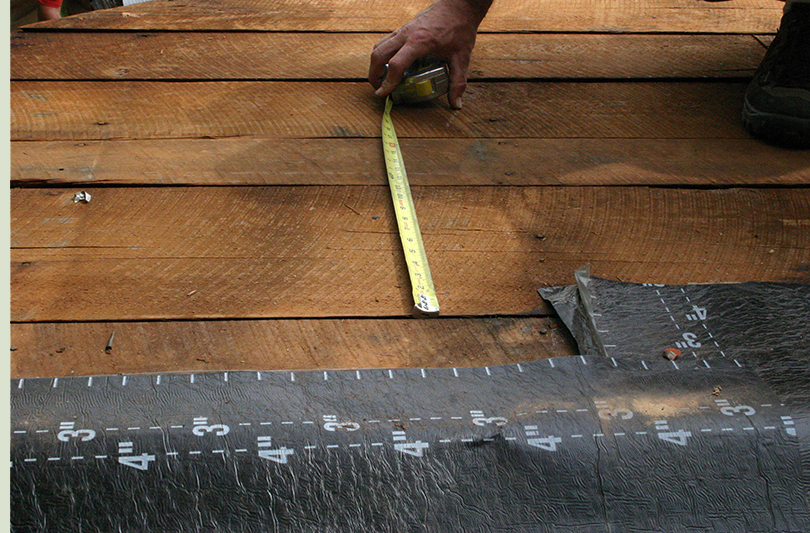
We had about a third of the new copper gutter laid down when a storm with softball-sized hail banged it up and punched holes that required replacing the entire roof in addition to starting over on the gutter!
State Farm Insurance sent an inspector who told us to pull the whole thing up and install a new roof. When he asked the sheet metal man what would be a suitable replacement, Mr. Swatley told him "That's very thick terne metal up there. They don't make anything like it now." The inspector asked what was the next best thing and was told that copper is the only material that would be historically accurate. "Do it. We'll pay for it," said the insurance man.
I fronted a check to pay for the copper and well into construction we received a check from State Farm for much less than half the full cost. When I called to protest, the person on the phone told me they had reviewed my policy and decided to pay for the lowest-cost type of standing-seam roof.
When I told the guy that his own agent had told us what to do up on the roof, with three witnesses present, the phone guy told me I could either take what they paid or try suing them. He let me know that a lawsuit would likely take a long time. So that was that. I don't know if there is a hell. If it exists, there is a special place for insurance companies.
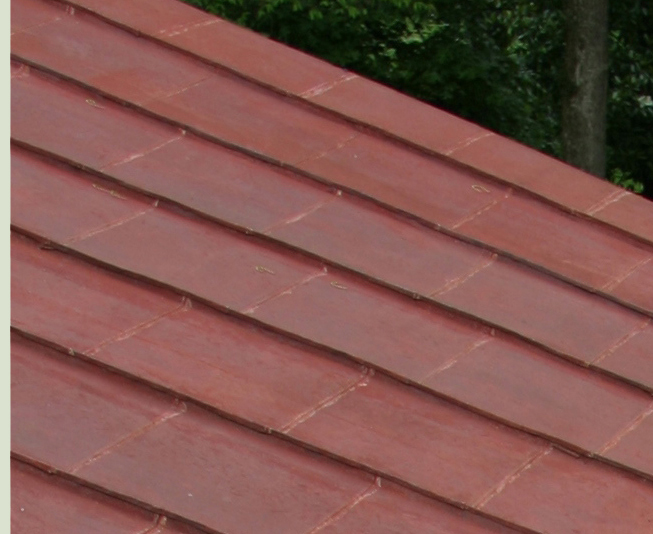
The original roof material with iron oxide paint. Vertical standing seams. This terne preceded modern roofing, and was available only as small rectangular sheets. There are hundreds of horizontal joints, flat lock seamed and lead-soldered.
We hope to save the roof over the single-storey part of the house as pictured here, since it was partially shielded from the high wind and hail.
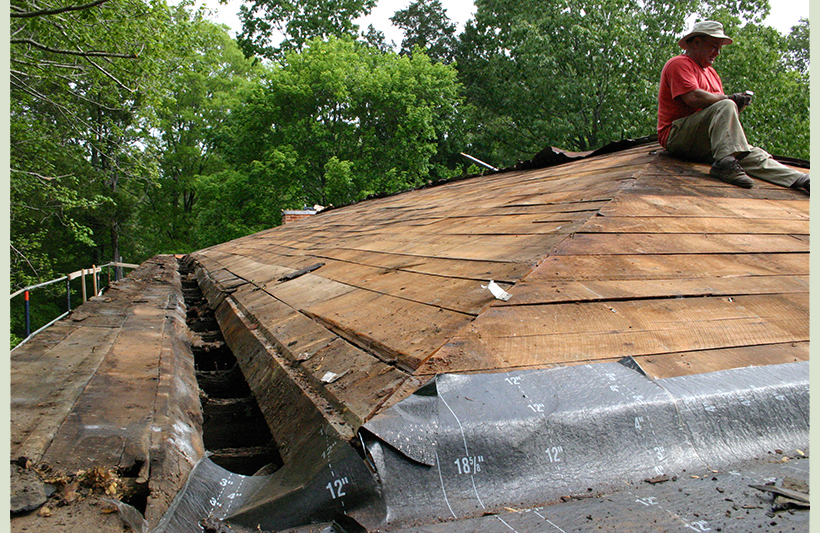
Unrestored gutter and roof. Jim Nolan did the carpentry almost single-handedly.
Jerry Swatley (shown here) and his son did the sheet metal work.
Almost all of the original 160 year old decking was intact. The boards were unusually wide and mostly center cut poplar with almost no cupping. They were ripped on a 45 degree angle to allow close spacing with tight gaps. They're still up there under a new roof.
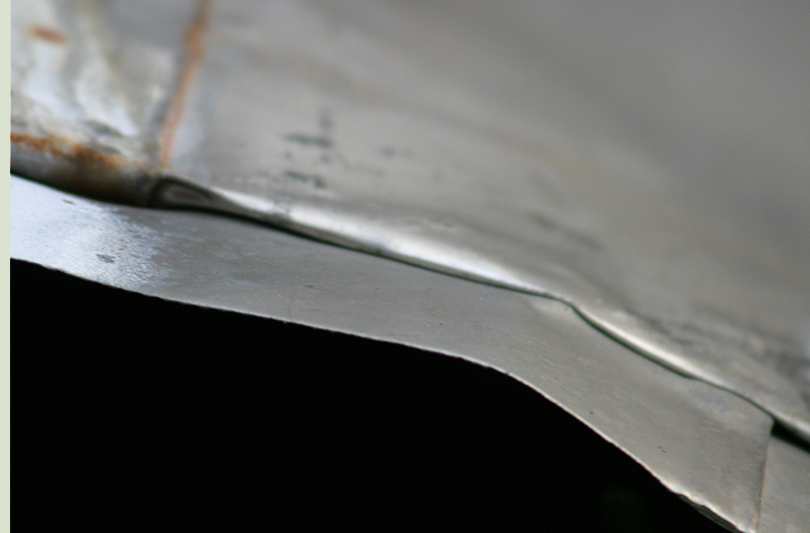
In areas that were well drained, the underside of the terne roof looked like the day it was made. This was installed in the early 1850s.
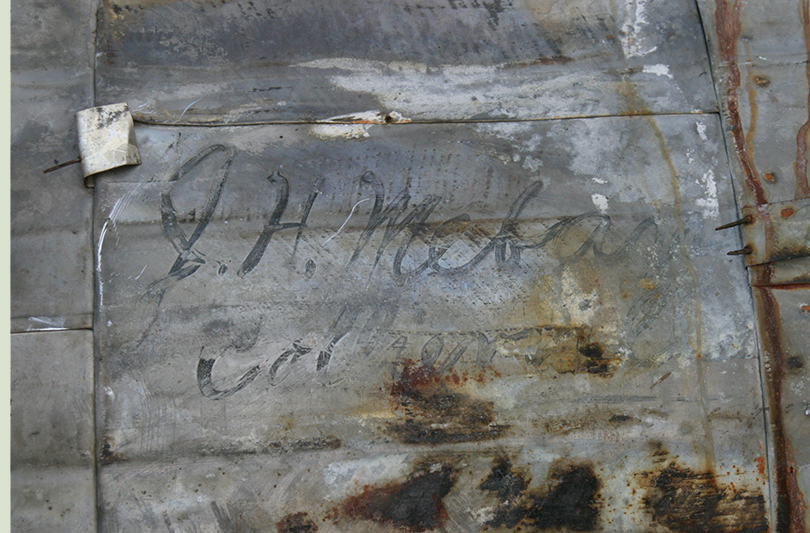
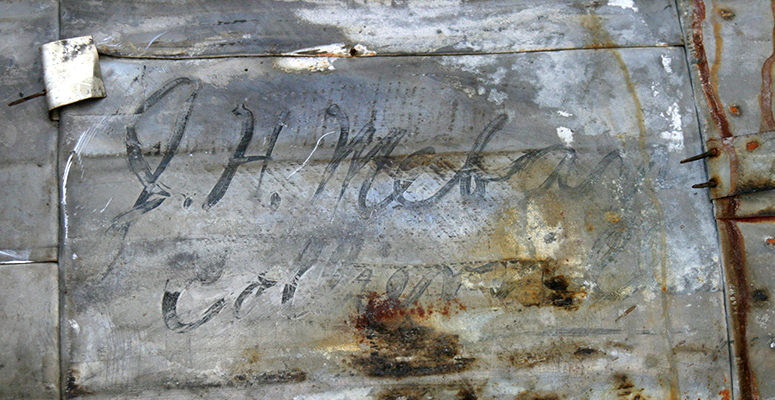
"J. H. Mebane Collierville" on the underside of several pieces of the original roofing metal.
This was probably a shipping label.
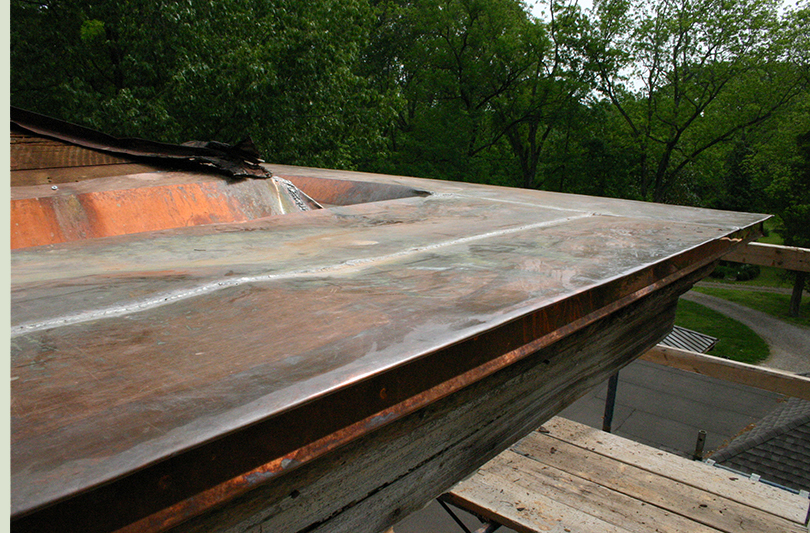
The original roof was a very thick terne, which is iron covered with an alloy of tin and zinc. The new roof and gutter are copper. Flat work is soldered as before. The roof is standing seam. This part of the integral gutter got banged up in the hailstorm. Part of it was saved, but large sections were punctured by the softball-sized hail and were replaced.
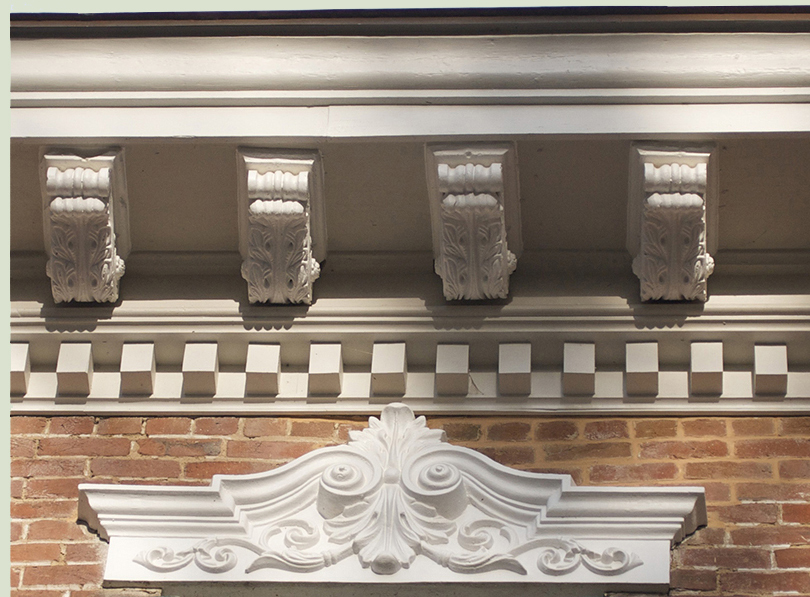
The newly-restored cornice.
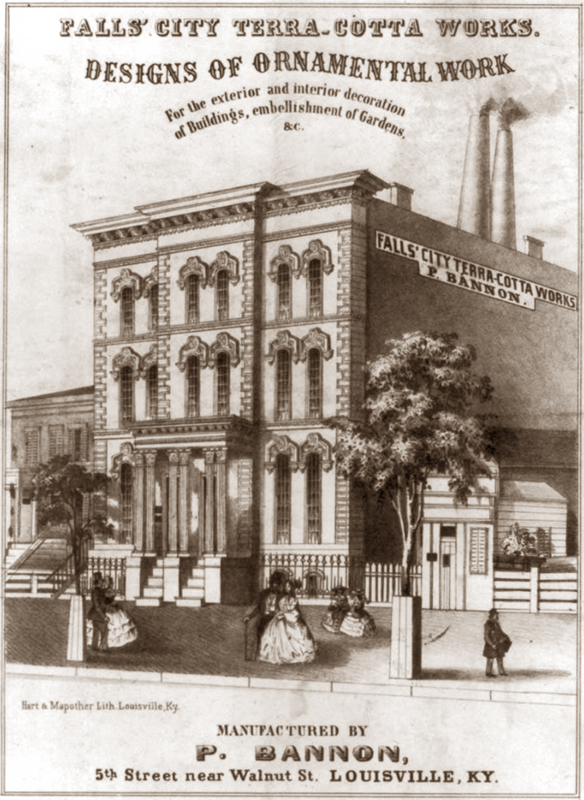
Several terra cotta brackets were broken or missing. We took a good one down, had a mold made by Dan Spector at Archicast, and recast about 15 new ones in synthetic stone. The originals were made by Falls' City Terra Cotta Works in Louisville, KY (impressed label on interior).
I made over 400 dentils and Jim put them up.
A paint scheme was worked out by Bonnie. The cast iron overwindow ornaments are white. Four shades of gray went on the cornice to accentuate the depth and shadows.
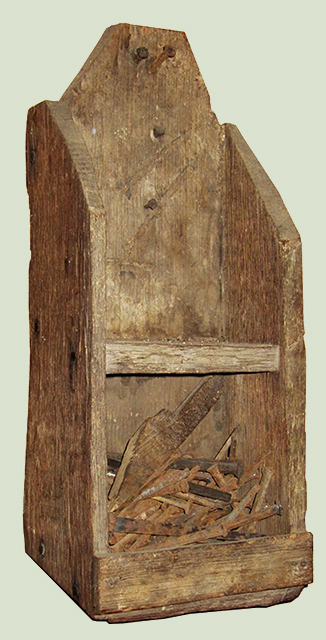
Surprise! Jim found an old candle box containing over 100 unused square nails lying on top of the beam of the west gallery roof support. The first carpenter left it there a long time ago, probably forgotten at the end of his project. Also included was a wedge from an old wooden plane.
While restoring the upper part of the front porch, we found two complex pieces of moulding in an inside corner that were completely rotted out and needed replacing. Part of this was going to be simple, but the central portion was not like anything we had encountered in other areas. To make less than two feet of this moulding, a cabinet shop wanted $700 to make the knives, a $100 setup fee, and $30 for the moulding itself.
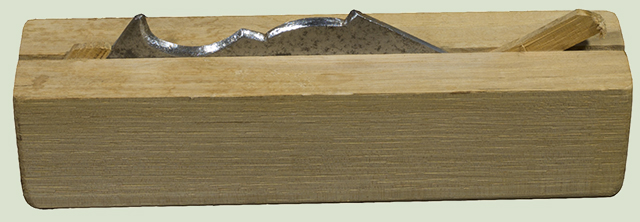
I decided to make the moulding myself. The basic form was roughed out on the table saw. To make the finished product, I built a tool. Starting with soft steel, I heated and oil-tempered the plate, and then slowly ground it to the necessary shape. Final sharpening was done with hand files. To limit chatter and avoid cutting myself, I placed the blade in a block of pecan wood and wedged it tightly in place. The tool worked as a combination plane and scraper to achieve the final profile of the moulding. When Jim Nolan and Chelius Carter returned after the weekend, I had the assembled moulding sitting on the cabinet top, ready for installation.
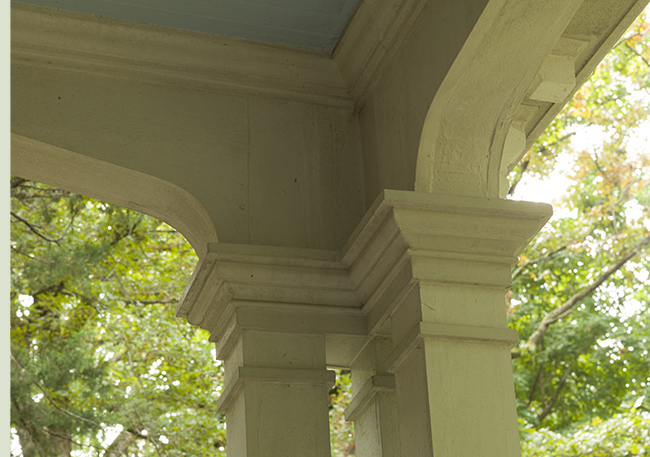
I made the inside corner of this column capital by hand using the tool above after achieving a rough shape with the table saw.
It doesn't look like it, but this whole thing was repainted last year.

West Porch Completed
Ronnie M.Warner, M.D. Bonnie R. Warner