Mebane-Nuckolls House
North Gallery
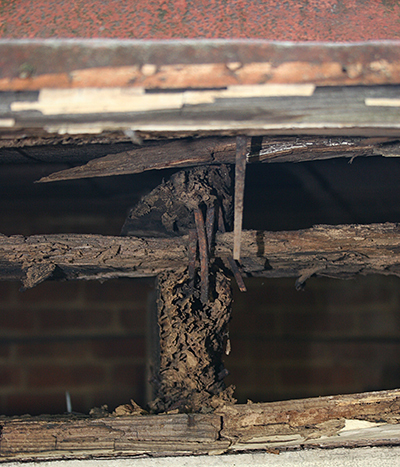
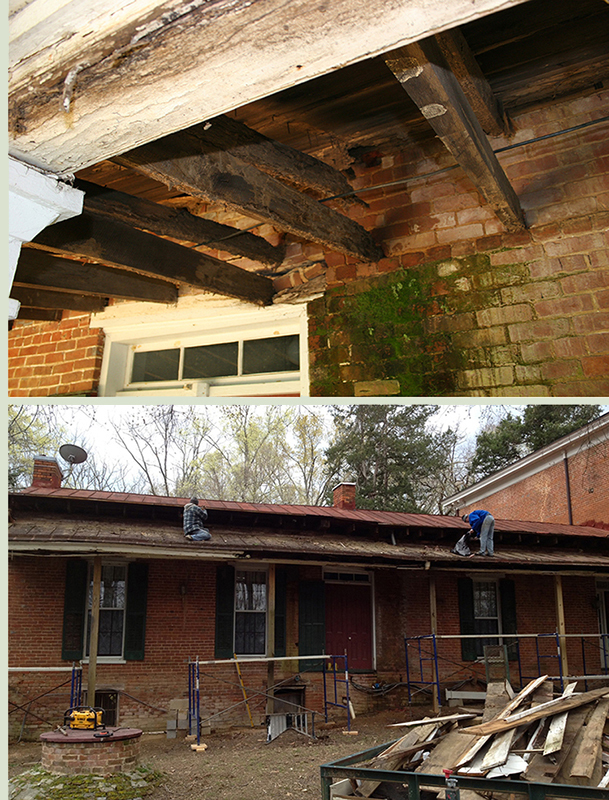
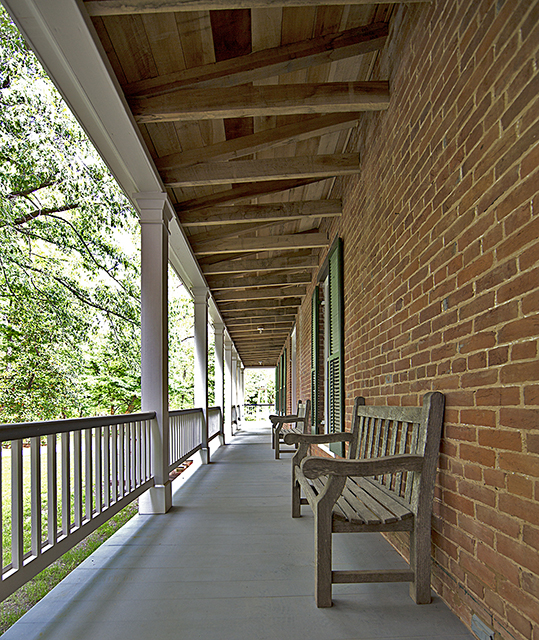
The first part of the house visible to those coming down the driveway is the north gallery, a columned porch over 60 feet long with two dogtrots. It has been in pitiful shape and quite an eyesore for years. Water coming down between the roof and the bricks has been taking its toll. But other projects were more critical and were dealt with as priority dictated.
I always knew this gallery to be the most distincive and the one that would best show off the old building materials and methods. Unfortunately, when we started taking it down it was obvious that very little could be saved. The entire roof had to go. Only a small section of the original rafters and ceiling joists could remain. The tails of all the rest were rotted out, and there would be no way to rebuild without newly-sistered lumber ruining the look of the whole thing. All but one of the columns were beyond repair.
So I made the decision to rebuild the entire gallery with exact duplication of the original materials and construction techniques. We were going for authenticity, down to using the same species of wood and square nailing the whole thing.
It was going to be another major undertaking, so we waited a few months for warm weather and the coffers to refill slightly. Thank goodness the kids were all out of school with jobs and the mortgage was paid off.

We found this old crop for tending animals on top of a ceiling joist. I imagine a kid threw it up there and it got stuck many years ago. It was nicely handmade with a spokeshave.
Gutter demolition and reconstruction
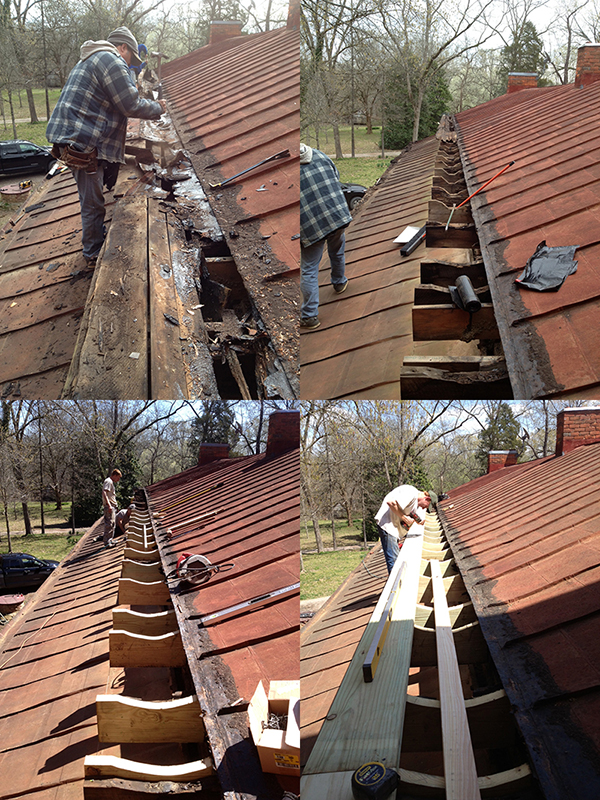
Juan is in the upper photos, Rocky in the lower.

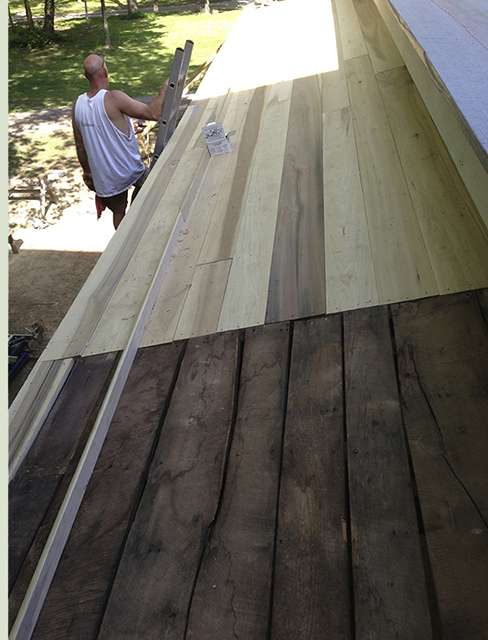
Porch roof construction.
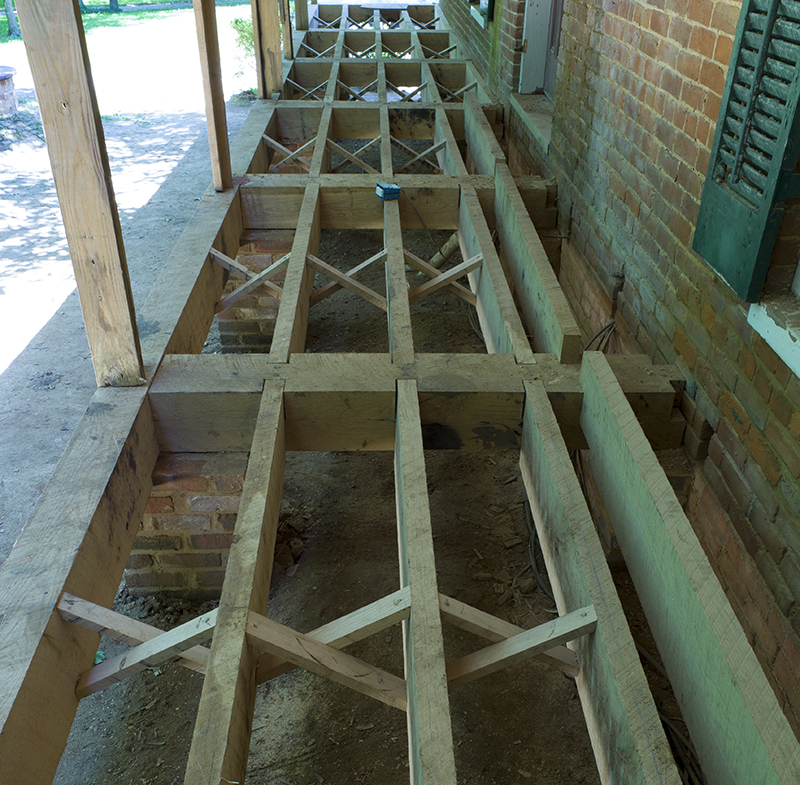
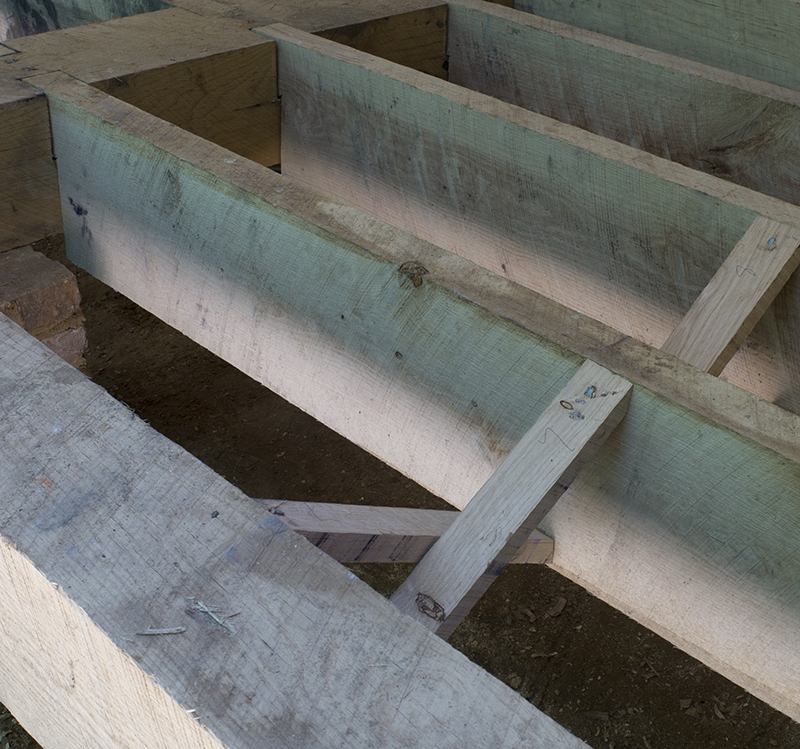
New joists patterned exactly on old ones, using poplar as before. At regular intervals, there were handmade wrought iron supports which we reused. Photos by Jim Nolan.
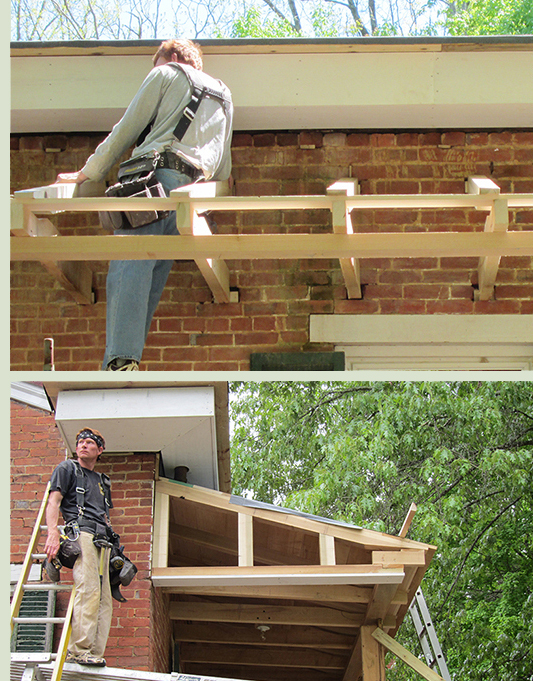
We went with the original method for tying the rafters and joists into mortises in the brick wall.
Rocky is a hard worker. He has been with Jim for several years.
That's Jim with the distinctive hairstyle.
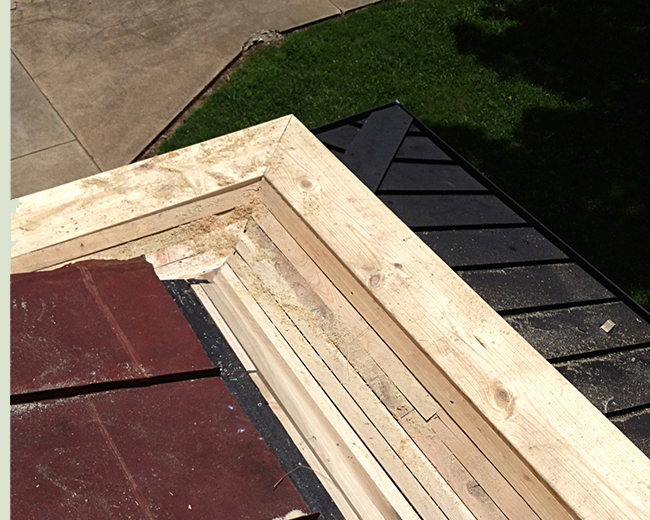
We were able to retain a small section of the original poplar decking. The box of square nails rests against the diverter, a dam-like feature that was designed to route rain water into the cistern.
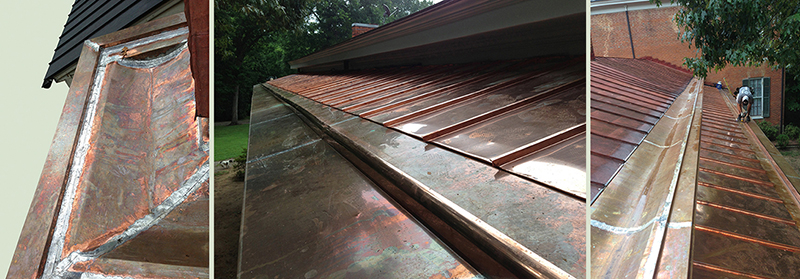
Copper gutter for the cornice and standing-seam roof for the porch.
We saved the original terne standing-seam roof on the house, but the integral gutter in the box cornice and the porch roof had rusted out. These were replaced with copper. Joe was careful to line up the seams so that from on the ground they appear to be continuous.
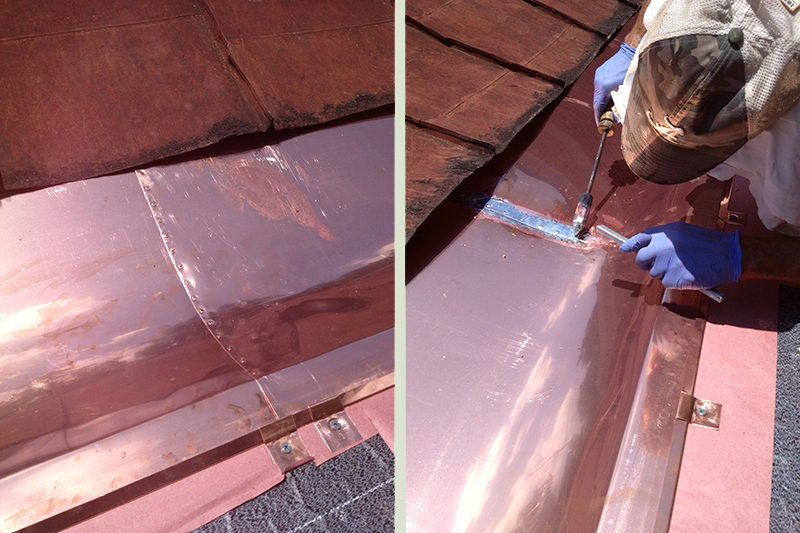
So you think you have a tough job? Joe B. Long riveted and soldered every seam. While he was doing this particular section, the official heat index was 114 degrees. I climbed up there for awhile, and in the sun it felt like the roof was at least 20 degrees hotter! He had a propane-fired oven up there to keep his irons hot enough to overcome the tremendous thermal conductance of the copper. Joe told me he will turn into a black man by the end of the summer.
The copper panels extend quite a way under the original terne roof. After completing the seams, he sealed the upper joint with a horizontal strip of stainless steel as shown in a photo above.
Foundation
Every pier was rebuilt and faced with 170 year-old brick from Elysian Grove, a house built the same time as ours a few miles from here and long since fallen down. The owner was kind enough to allow us to harvest the old bricks.
The front beam is 8" wide x 10" thick. Cross beams are 8x8 and joists are 3x10, mortised and cross-braced as done originally. All mortises were cut by hand with hammer and chisel. Rear joists will be dropped in after the electrician reroutes the wiring under the house.
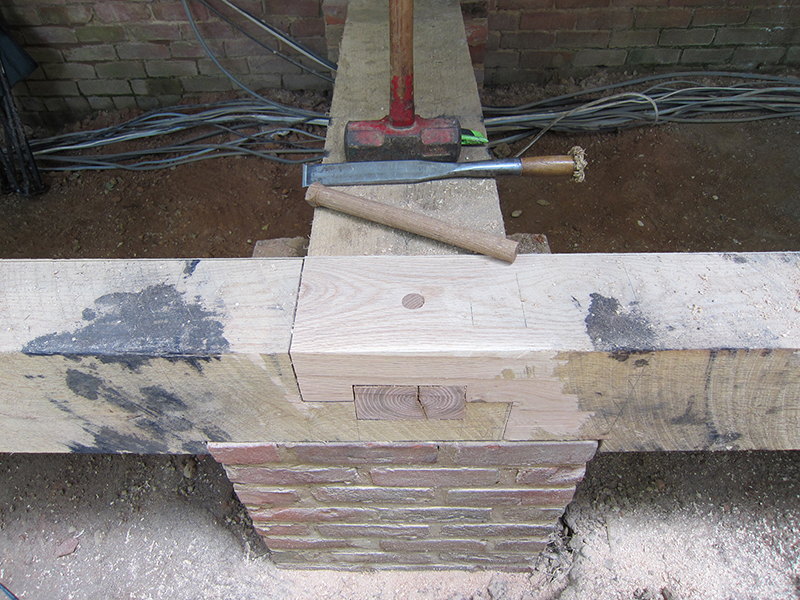
These beams will be here for many years. White oak, mortise-and-tenoned and pegged. 1" diameter white oak pegs were made on my lathe. The sledge hammer is needed to "pursuade" the beams to move during final adjustment.
Everything is square nailed. Tremont Nail Company in Massachusetts still makes them with the old machines.
Southeast Gutter Restoration
During reconstruction of the north gallery, we decided to go ahead and fix a major headache. Water had been pouring through the southeast gallery gutter every time it rained. We had buckets scattered across our breakfast room to catch it. It was a good time to completely tear down that gutter, rebuild it along original designs, and cover it with new copper.
The Brick Man
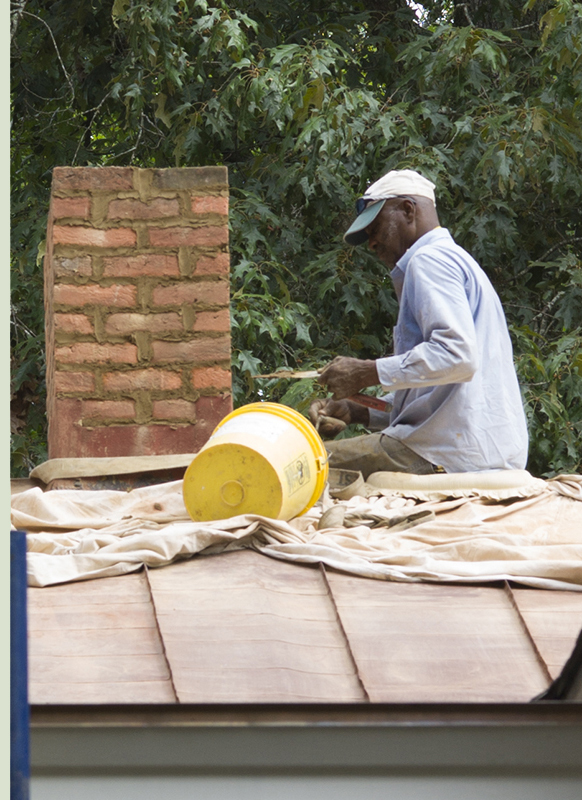
John Jenkins repointing one of the chimneys. He will come back in a few hours and clean the joints up. Mr. Jenkins is the best at matching the old mortar, using a combination of buff, gray and white mortars mixed with red and white sand. When this dries, it will lighten up and look just right.
We have tried several brick masons, and Mr. Jenkins is a godsend. The others were set in their ways and not willing to go to the trouble to learn how the old masters did it. The flush joint and color matching are critical. A walk around the house will be revealing. Attempts made by others "stick out like a sore thumb." It is very difficult to see where John has been.

It's time to make some rails and lots of spindles.
Apparently a tenant family got cold one winter. They pulled the old rails out and chopped them up. Mr. Nuckolls came by one day and they were in the fire.
Mr. Perkins did not go back with upper and lower rails or spindles. Instead, he went with a single rail constructed of two 2x4s nailed together to make a "T."
Fortunately, one of the original posts provided what we needed to make the upper and lower rails and spindles.
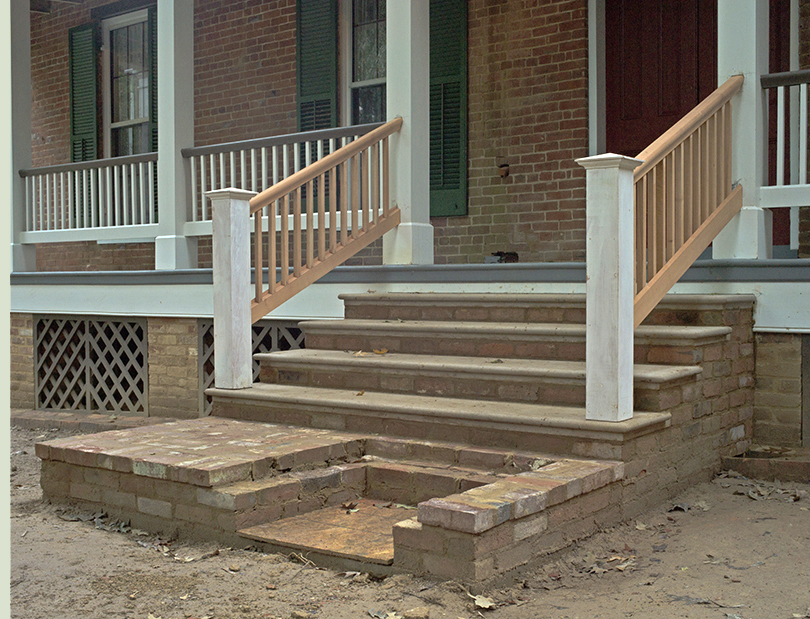
We finally get some steps
"Two weeks," was the reply from the salesman when I asked how long we would have to wait on the limestone steps.
Two months later, they finally came in. Jim and his crew have to eat and pay bills, so they had to move on to other projects. Fortunately, they are flexible and willing to work us back in.
Being an OCD physician, this kind of thing drives me crazy. But what the hell. We're back at it.
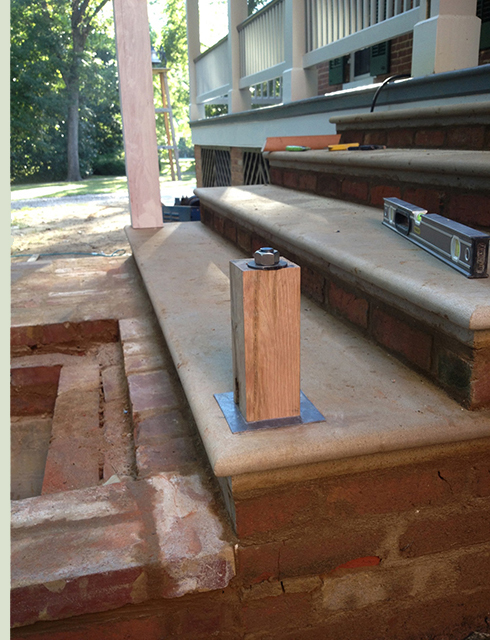
The photo above shows an 8" long solid block of white oak drilled and bolted to the foundation using 3/4" stainless steel threaded rod. The lead is a time-honored method to fight rot from water pulling into the wood by capillary action in the end grain. The block serves as an anchor for the newel post.
Photo by Jim Nolan
Why can't anything be simple?
Complications. It's a rule of home ownership, and doubled up when restoring an old one.
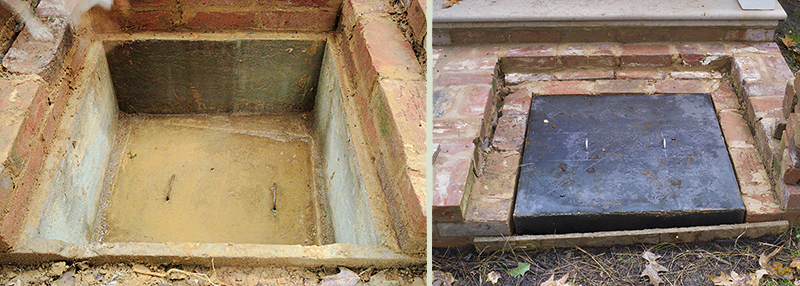
When plumbing the house for the first time, the previous owner set the septic tank right in front of the dogtrot. It was an easy and logical placement since he elected not to put steps there. But when we got to looking at the length of this porch (over 60 feet), it really needed steps coming down from the middle door.
The problem is that the septic cleanout is right where the landing needed to be, and we will have to get that opened up eventually. So our solution was to frame it out prior to the concrete pour, build a heavy steel box, set it over the cleanout, and brick over the lid in a way that it can be removed. I think it will work satisfactorily. We sure hope so.
Come up and set a spell.
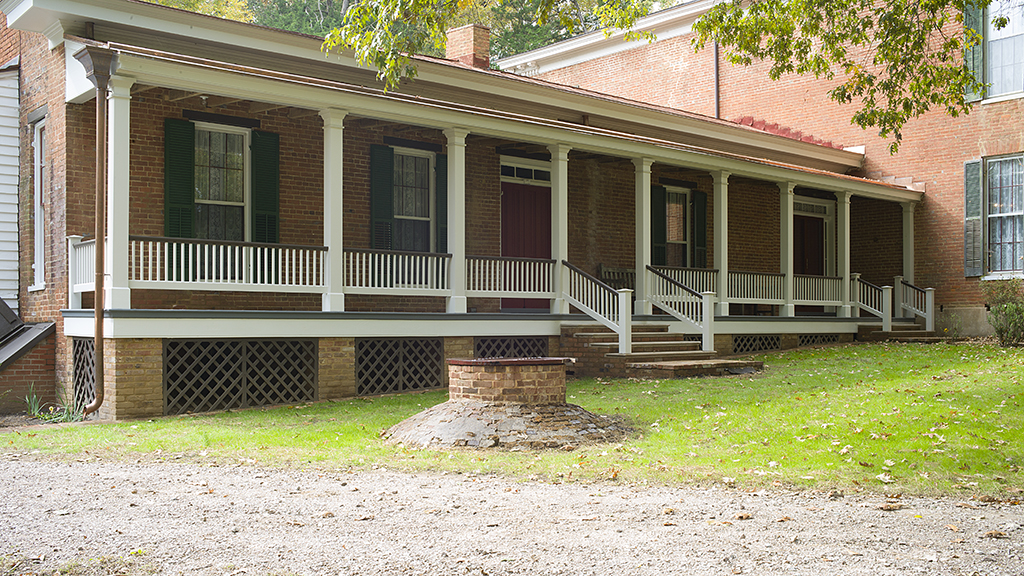
The final brick was laid on October 28, 2013.
All of the posts except for the one against the far wall were rebuilt. The others were too rotted to use, but I have saved several of them.
Since this is a north exposure and it is shady, I was worried about moisture resistance and decided to build all the railing out of African mahogany. It was beautiful and almost a shame to paint, but we are going for authenticity here.
We built the lattice in the workshop as usual. It was a challenge to build it to follow the hill and retain the pattern angles and spacing, but figuring out things like this is fun.
Rebuilding a gazebo around the cistern will be a project for next year. We have an old photo to guide us.
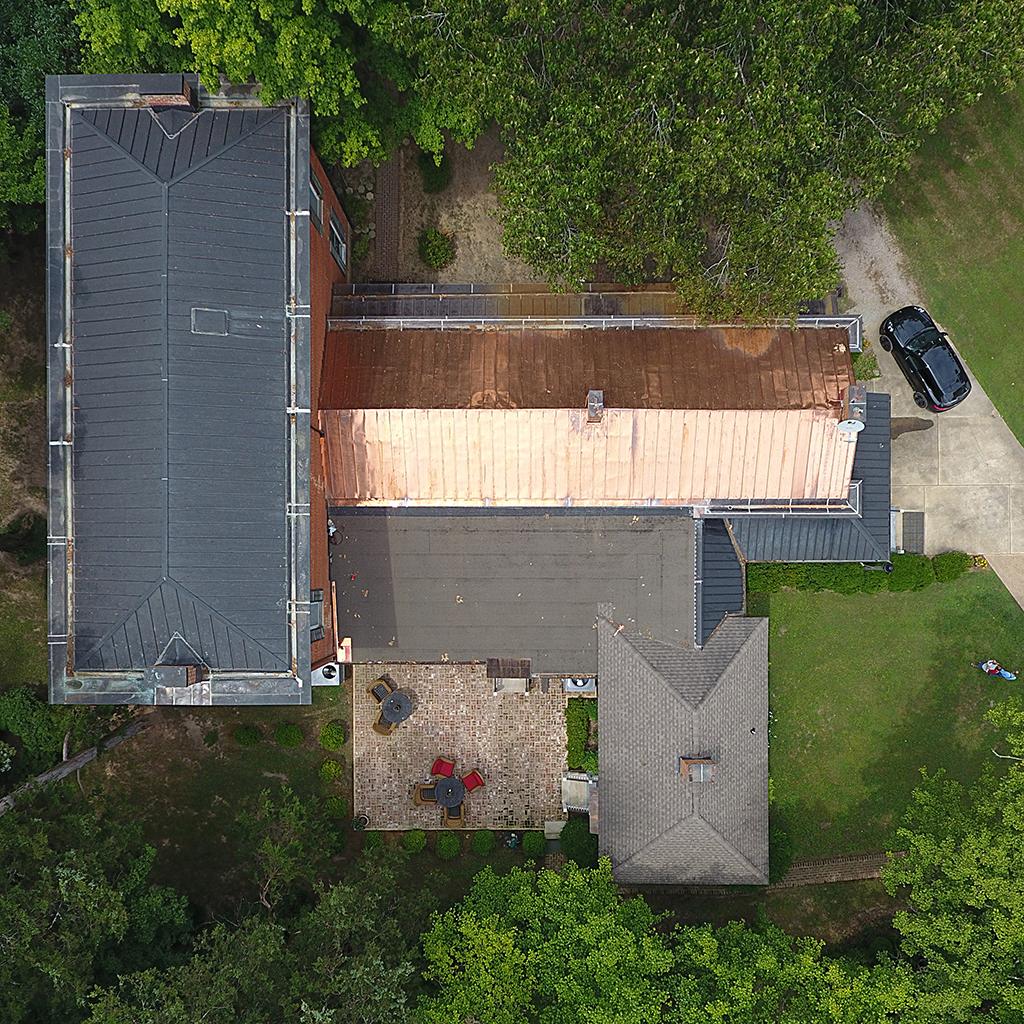
July 2016 update:
Joey came over as the family celebrated July 4 a day earlier. He brought his drone over. We developed roof leaks, and decided the old tern roof had to go. Joe Long and his helpers are almost done with the new copper. The two-storey house had its similar roof in 2006. Hopefully, they will both mellow out to verdis gris eventually.
Forward to Page 6: Guest bedroom
Ronnie M.Warner, M.D. Bonnie R. Warner